First Steps
This section covers the steps needed to get the RTU-X up and running and start working on its configuration.
Powering on the RTU-X
To turn on the RTU-X, activate the power switch, located as shown below depending on the model:
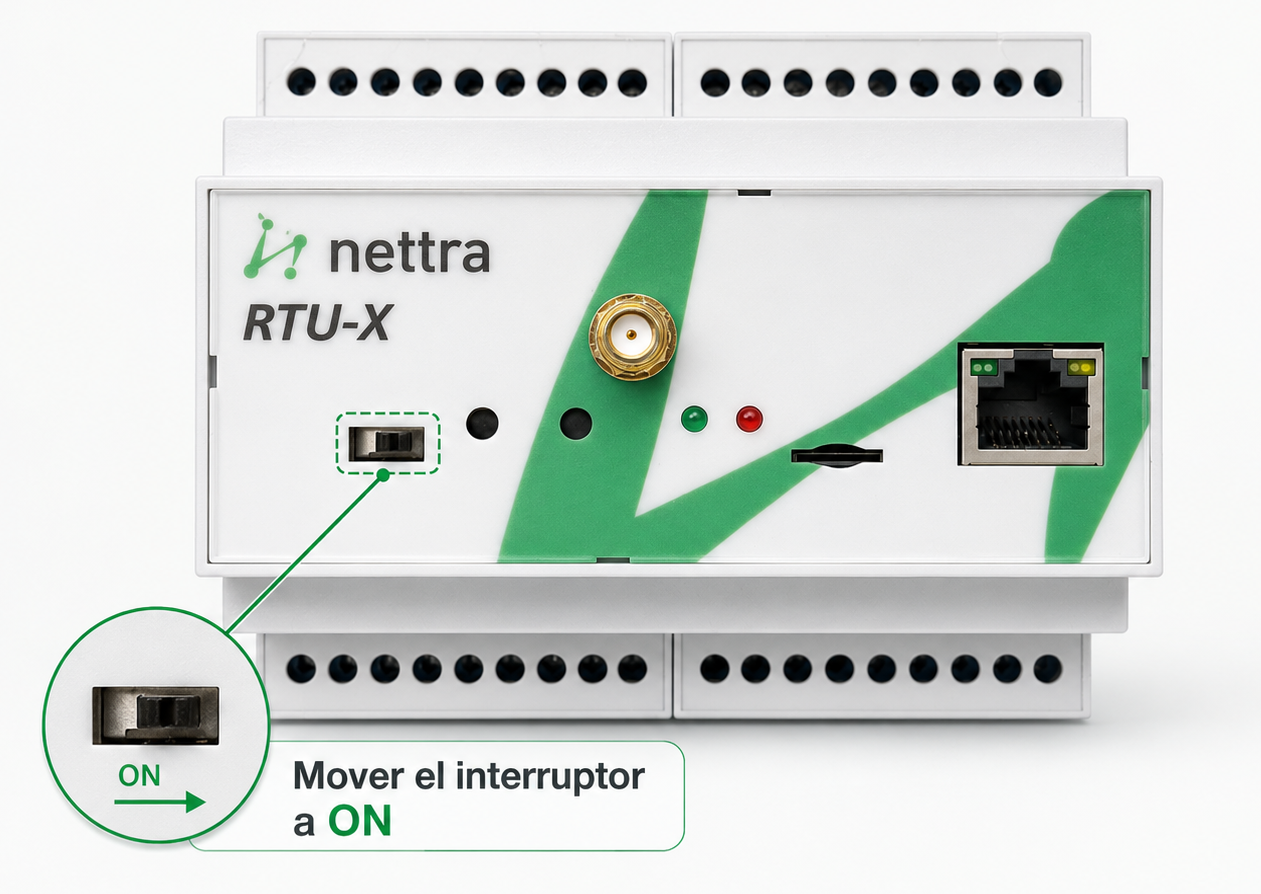
DIN Model
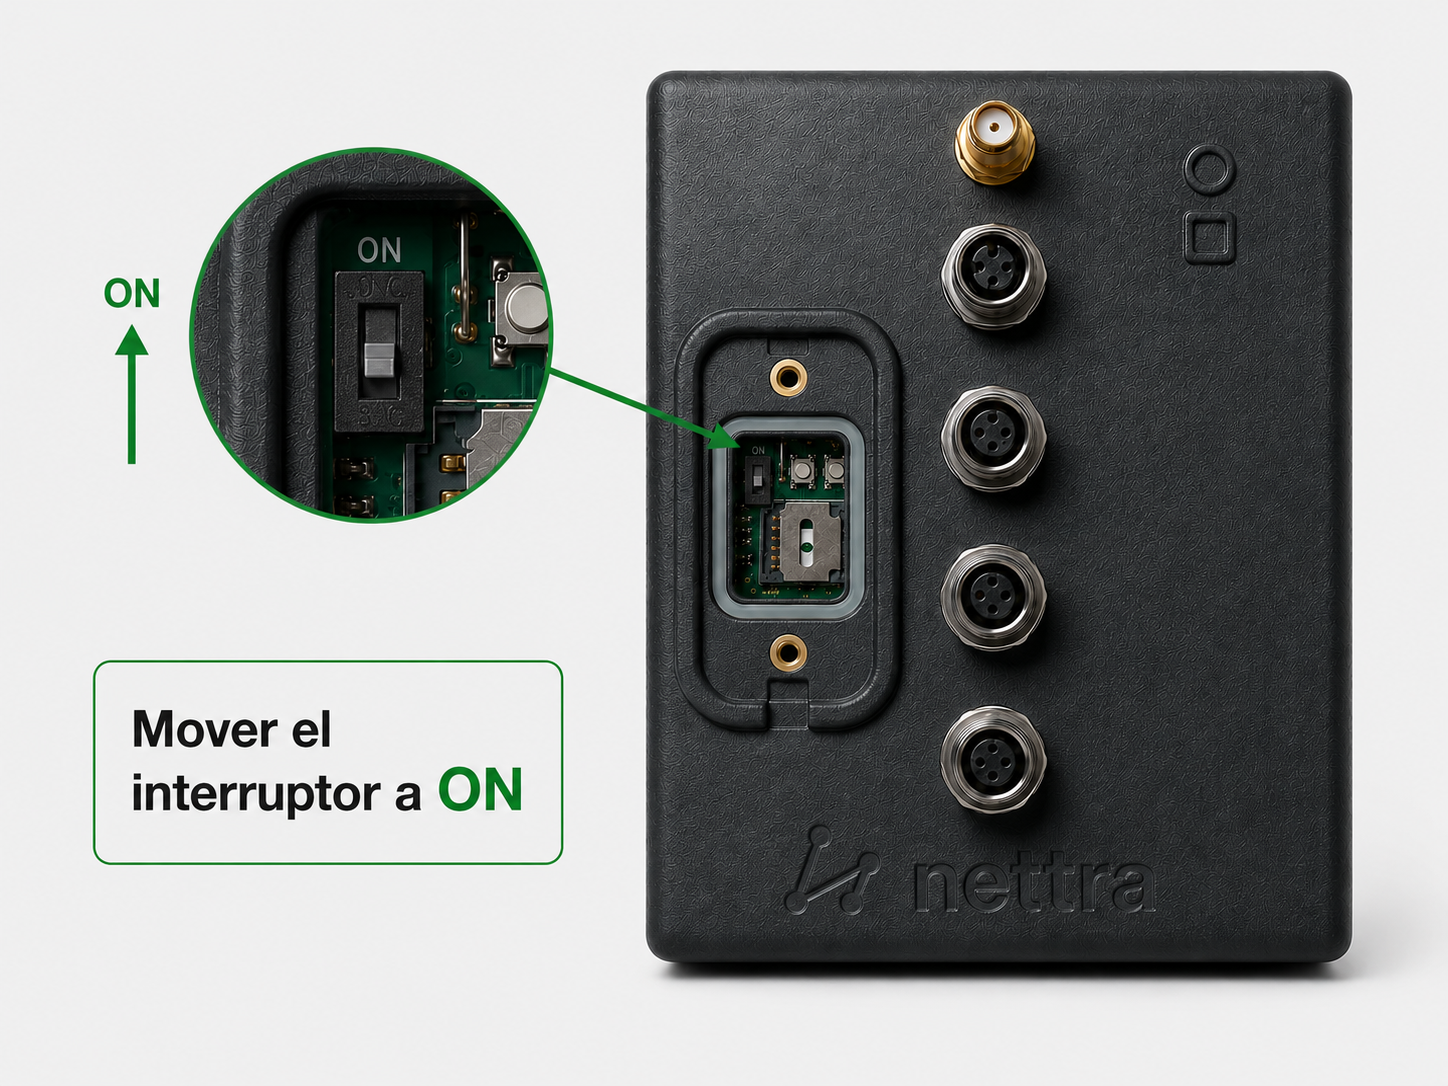
IP68 Model
If the RTU-X battery has enough charge, you should see the green LED turn on.
If the battery is discharged, connect the external power supply to turn the device on and charge it:
- VDC model: connect VDC and GND with 8-30 VDC.
- VAC model: connect L and N with 110-220 VAC.
See the physical connections section for more detail.
Configuration tools
There are two ways to connect to and configure the device:
- With a web browser, connecting to the embedded web server in the RTU-X. All you need is a PC or mobile device with a browser (Chrome, Firefox, Microsoft Edge, etc.)
- With the user interface for PC, available for download at Downloads.
The web interface allows for limited administration of the device: setting up the WiFi network, Bluetooth, and viewing the log. Full device configuration, including changing the password, is only available from the PC user interface.
Connecting to the RTU-X
By default, the RTU-X creates its own WiFi access point:
- Network:
RTU-X-YYYYYY, whereYYYYYYare the last 3 bytes of the device's MAC address. - IP:
192.168.4.1
Once connected to this network, you can access the RTU-X at that IP address. Both the web browser and the PC user interface will prompt for the device password.
Default passwords
| Access | Factory password |
|---|---|
WiFi access point (RTU-X-YYYYYY) | password |
| Device (web interface and user interface) | password |
| Bluetooth pairing PIN | 123456 |
Factory passwords are the same on every device. We recommend changing all three before a field installation, so that no one nearby can connect to the device and change its configuration. The access point password and the Bluetooth PIN are set in Communications; the device password can only be changed from the PC user interface.